

How Do You Change Your Cell Phone Number
How to Change the Trusted Telephone Number for Your Apple ID
Apple tree uses a trusted phone number to verify your identity when signing in to your Apple ID. Here's how to change it on from an iPhone, iPad, or Mac.
If you lot're switching to a different carrier, y'all may want to change the trusted phone number that's linked to your Apple tree ID. It comes in handy for 2-factor authentication purposes and ensures you aren't completely locked out of your account.
You lot tin add multiple trusted phone numbers to your business relationship as well, provided you lot use more than one phone. Apple makes it easy to do right from your iPhone, iPad, and even your Mac. Here, we'll look at how y'all tin can update the trusted telephone number in iOS and macOS.
What Is a Trusted Telephone Number?
A trusted phone number is simply a phone number that Apple uses to verify your identity when you sign in to a new device with your Apple business relationship. It acts as a 2d layer of security for Apple's two-factor authentication (2FA) system.
Typically, when you log in to your Apple ID account from a new device, you'll become the 2FA prompt on your trusted devices. Just if that doesn't work, or you don't have access to your trusted device, you tin asking Apple to send a verification code to your trusted phone number equally an SMS.
How to Add together or Remove Trusted Phone Numbers on an iPhone and iPad
When you first enable 2FA on your Apple tree account, the phone number you lot use with your iPhone is automatically registered as a trusted number. All the same, y'all can follow these uncomplicated instructions to add together, remove, or update a trusted phone number on your iOS or iPadOS devices:
- Go to Settings on your iPhone or iPad.
- In Settings, tap on your Apple ID name, located at the top.
- Next, select Countersign & Security from your Apple tree ID settings.
- Here, you'll run across your current trusted number. Tap on Edit next to the trusted phone number.
- Now, tap on Add together a trusted phone number to go started.
- You'll need to enter your device passcode to authenticate the process.
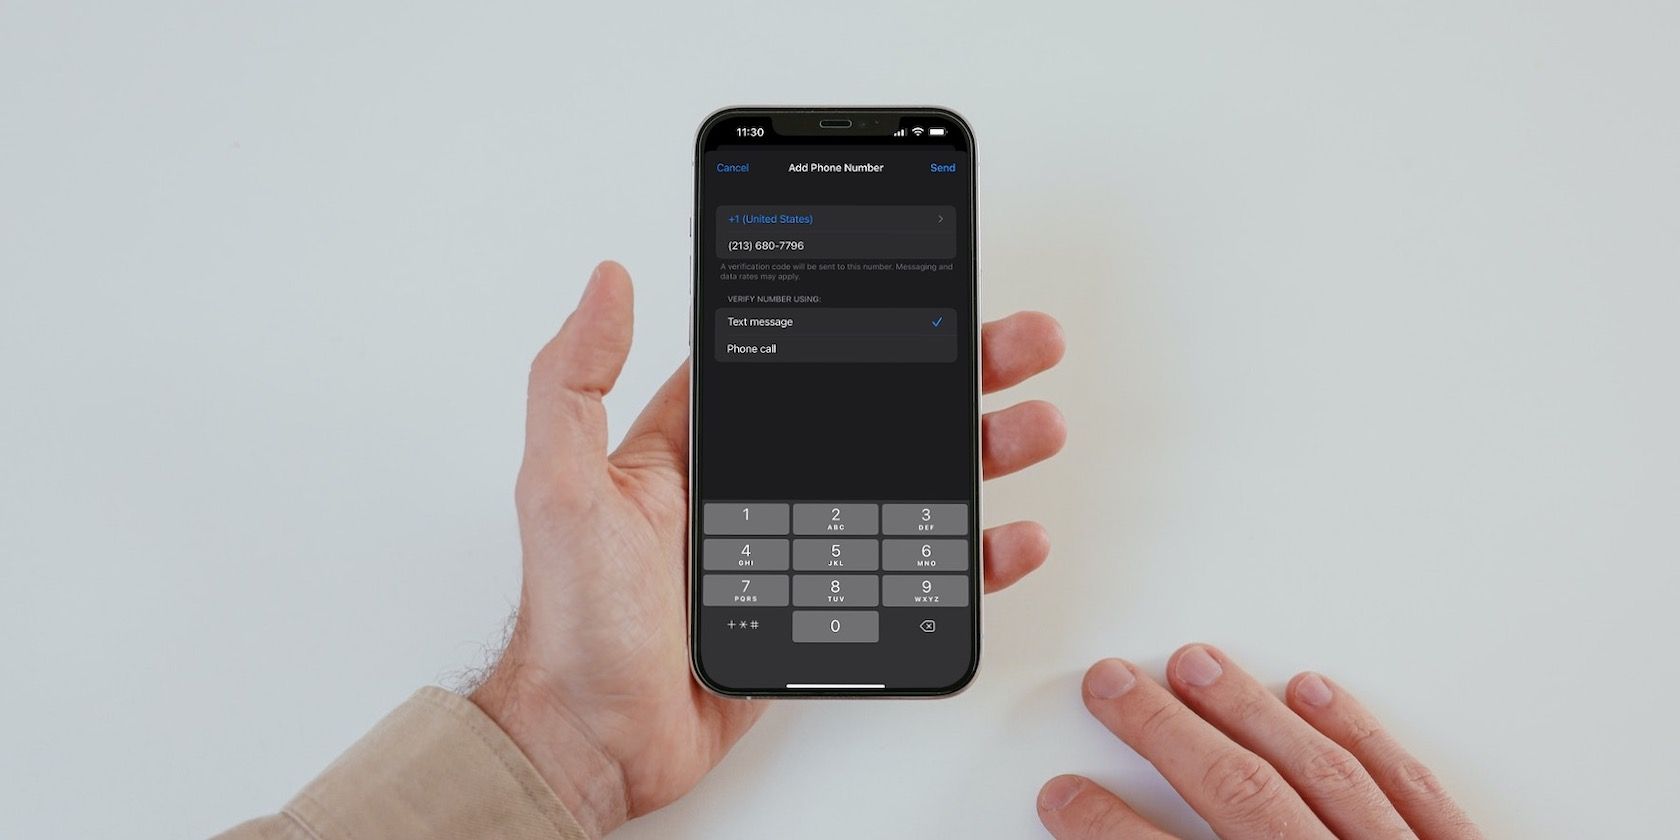
- Next, select the land code and type in the number. Y'all tin can either choose to verify your number using a text message or a telephone telephone call. When you're ready, tap on Transport.
At this point, all yous demand to do is enter the verification code y'all receive to register this new phone number every bit a trusted phone number. And when yous finish, y'all should exist set to use this alternate way to sign in to your Apple business relationship with 2FA.
How to Add or Remove Trusted Phones Number on a Mac
If y'all're reading this on your Mac, y'all tin can also update your trusted phone number in macOS in a somewhat similar fashion. Bold y'all accept a 2FA-enabled Apple business relationship, here's what you need to practice:
- Head over to System Preferences on your Mac.
- Click on Apple ID in the upper-right corner of the window.
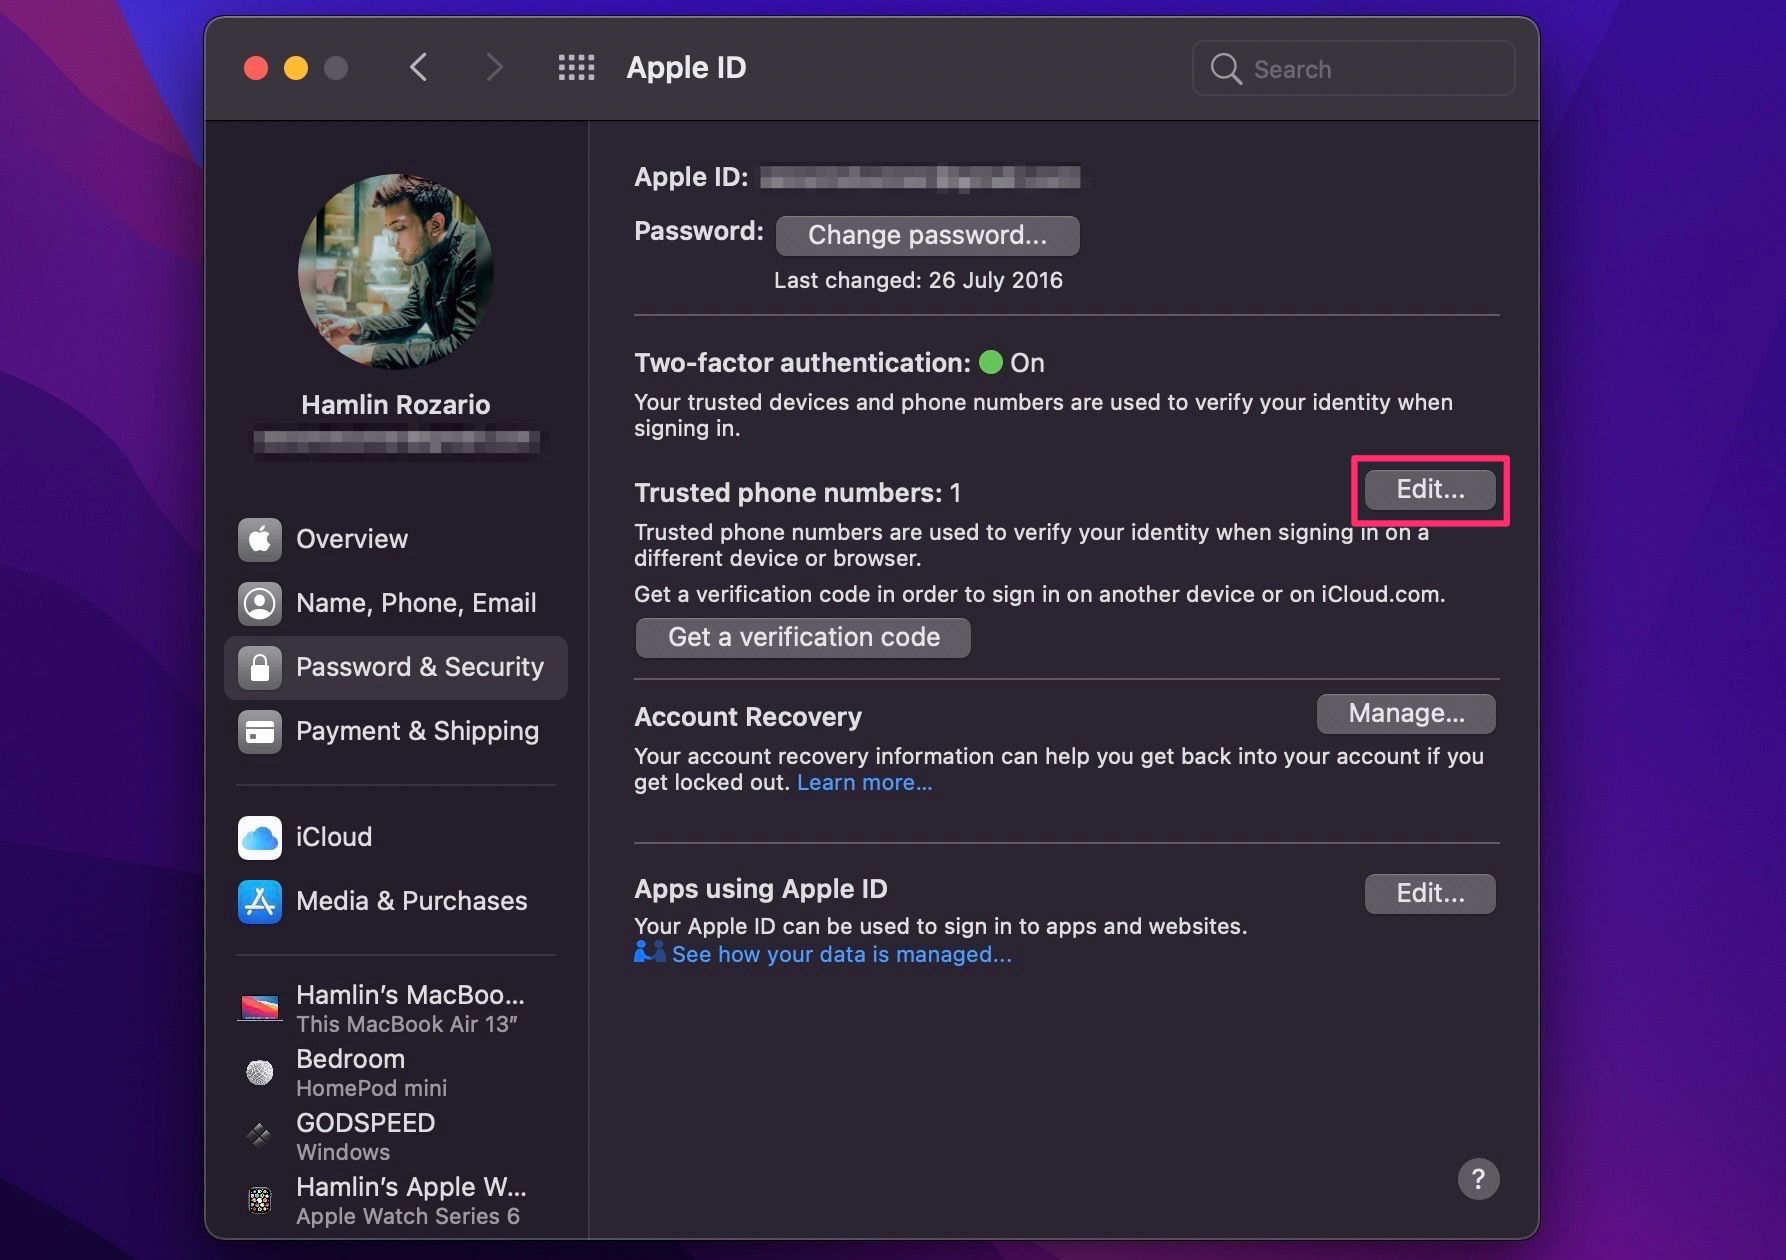
- This should display your Apple tree ID settings. Select Password & Security from the left pane.
- Hither, yous'll notice the Trusted phone numbers section on the right. Click on Edit next to it.
- Now, you'll see your current telephone number along with the option to add a new one. Tap on the plus (+) icon to get started.
- Side by side, you need to enter your Mac's user password before entering the new phone number and country code.
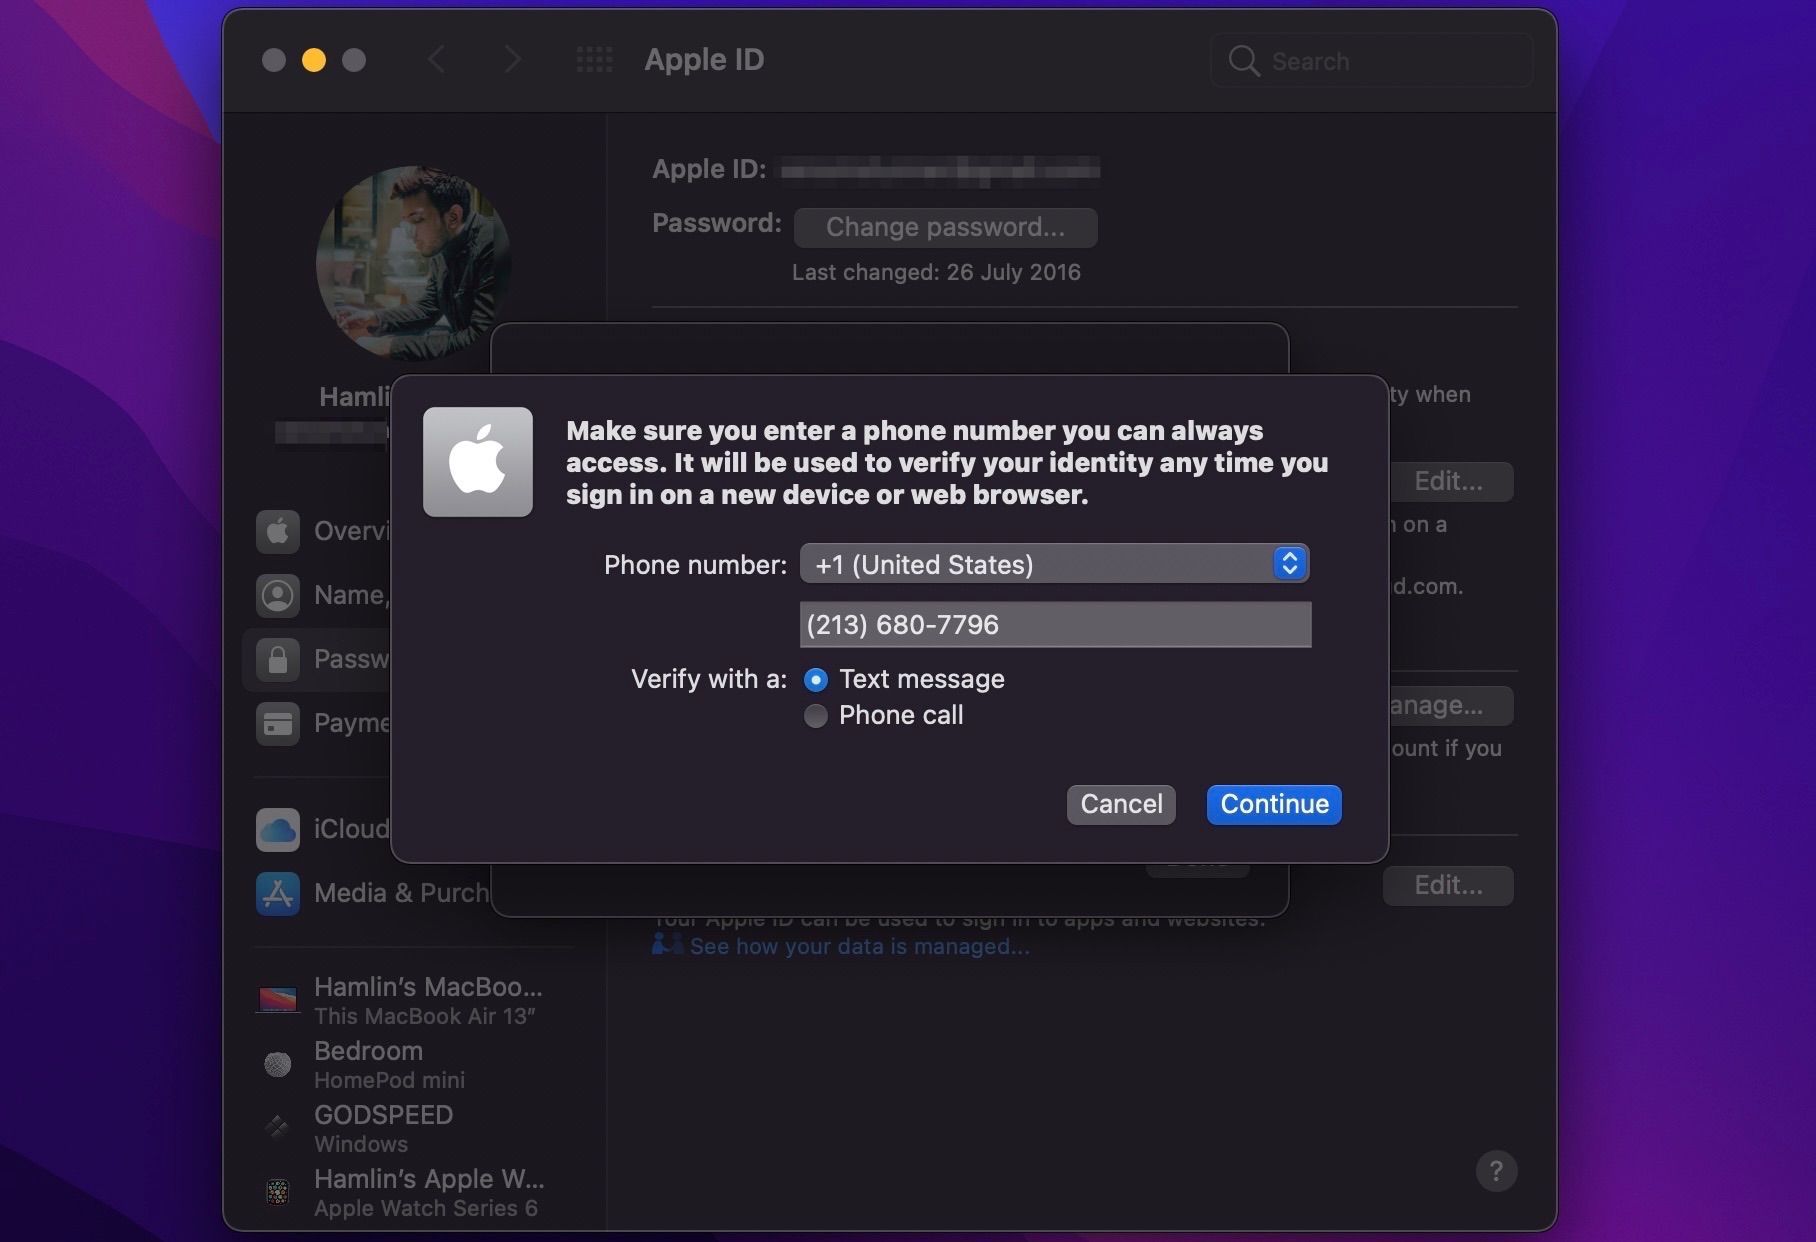
You'll get a verification code on your new phone number for confirmation, subsequently which you can utilize it as a fill-in method to log in to your Apple account from new devices.
A Trusted Phone Number Helps You Log In Without a Trusted Device
Using a trusted phone number will be your only pick when you don't accept access to a trusted device, like your iPhone, iPad, or Mac. Too that, Apple's 2FA popups may glitch out sometimes and have a long time to show up. In such cases, a simple text message with the verification lawmaking would be a faster way to sign in to your Apple account.
And if you're someone who uses multiple phones, you can add together multiple trusted numbers to make sure y'all're never locked out of your business relationship.
About The Author


How Do You Change Your Cell Phone Number,
Source: https://www.makeuseof.com/how-to-change-trusted-phone-number-apple-id/
Posted by: pageothessonce.blogspot.com
0 Response to "How Do You Change Your Cell Phone Number"
Post a Comment